
How to photograph Sossusvlei and Deadvlei well: why staying inside the Sesriem gate matters, the light each dune wants, the kit that survives the sand, and a realistic morning plan.
- Location
- Namib-Naukluft National Park, Namibia
- Nearest gate
- Sesriem (entry point and inner camp)
- Best months
- April to October (cooler, clearer)
- Tallest dune
- Big Daddy, around 325m
- Deadvlei trees
- Camelthorn, roughly 900 years old
- Key access
- Last 5km is soft sand; 4x4 or park shuttle
Sossusvlei is the great salt-and-clay pan at the heart of the Namib-Naukluft National Park in Namibia, ringed by some of the tallest dunes on earth. For photographers the draw is twofold: the apricot-to-blood-red sand that shifts colour by the minute, and Deadvlei, a separate white pan a short walk away studded with 900-year-old camelthorn trees, blackened by sun and too dry to rot.
The pictures everyone covets here are won or lost on timing. The dunes reward the first and last hour of light, and Deadvlei has a narrow magic window of its own. Getting into position before the sun is high is the single biggest variable you control, and it hinges almost entirely on where you sleep the night before.
This guide covers the locations and the light each one wants, the kit that survives blowing sand, the exposure and composition choices that matter, and a realistic plan for one productive morning.
Why staying inside the Sesriem gate changes everything
Sossusvlei sits about 60km inside the park from the Sesriem gate. There are two gates in practice: the outer gate, which day visitors use, and an inner gate at Sesriem that opens to guests staying at the camps inside the perimeter. Guests inside the gate are let through at first light, roughly an hour ahead of day visitors waiting outside.
That hour is the whole game. It is the difference between standing on Dune 45 as the sun breaks the horizon and arriving to find harsh, flat midday light and other people's footprints already crossing every ridgeline. If photography is your priority, book accommodation inside the gate, even for a single night, and accept the premium.
Sunrise and sunset times shift through the year, so confirm the current gate opening hours when you arrive and ask the reception desk exactly when the inner gate lifts. Plan to be queued at the gate before it opens, not driving towards it.
Dune 45 and the classic sunrise S-curve
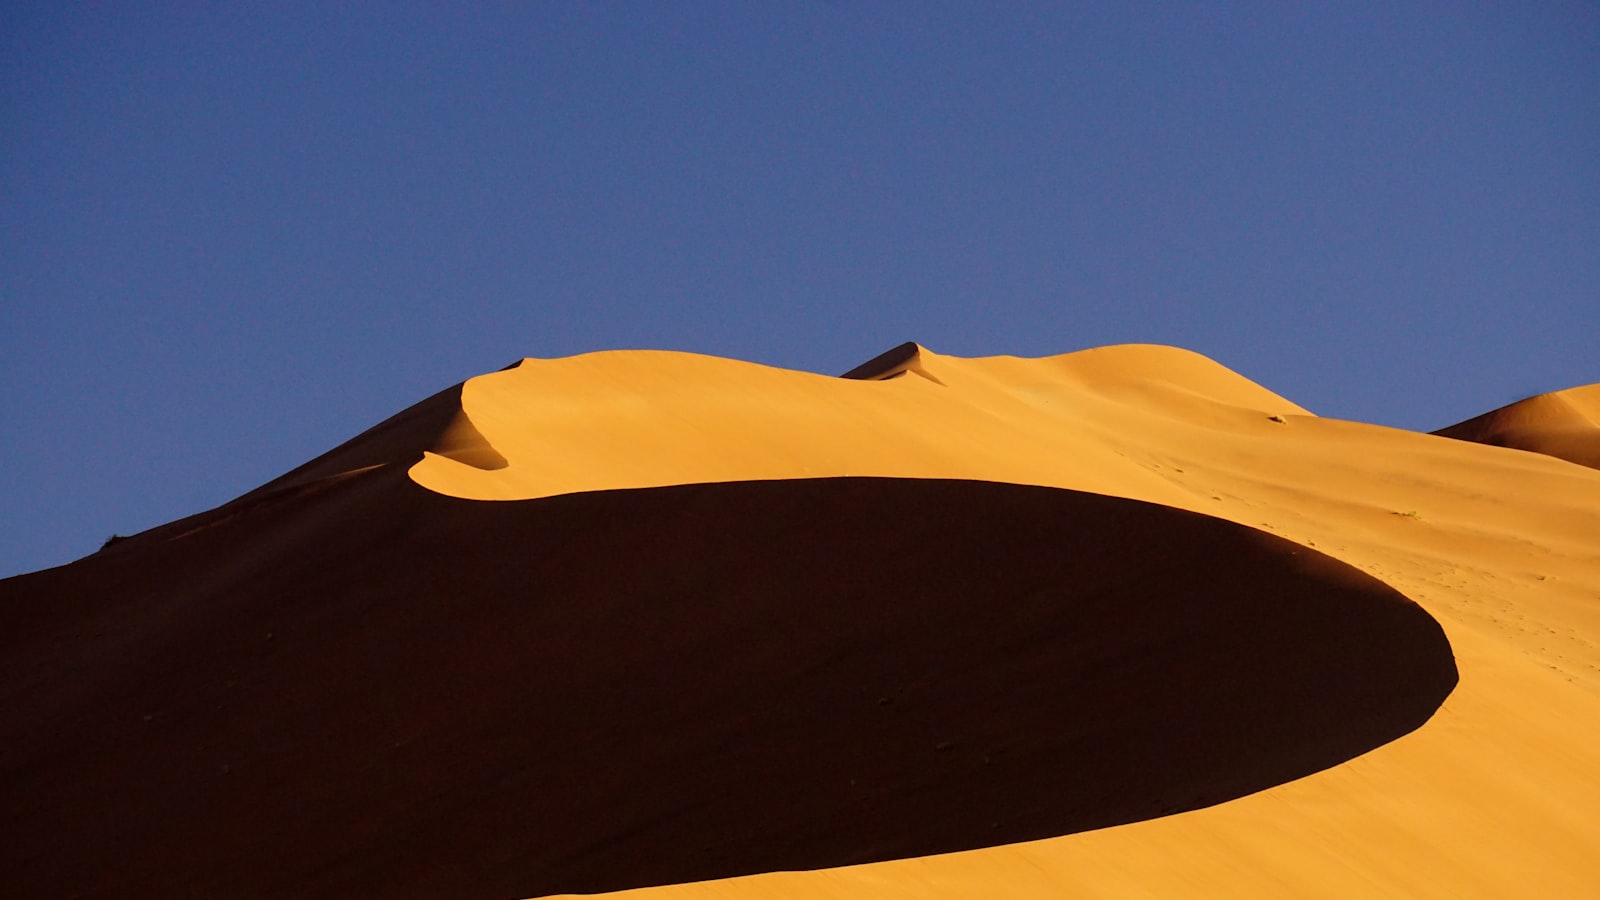
Dune 45, named for its position 45km from Sesriem, is the postcard dune: a clean, sweeping ridgeline that catches the first sun on one face while the other falls into deep shadow. The contrast between the lit and shadowed flanks is what makes the shape read, so you want side-light, not front-light.
Work the curve of the ridge with a longer lens to compress the layers, or place a lone climber on the crest for scale; a single small figure against an empty dune is one of the most reliable compositions here. The light is best in the twenty minutes either side of sunrise, when the sand glows orange rather than yellow.
- Side-light reveals every ripple and ridge; shoot across the dune, not into it
- Include a small human figure on the crest to communicate scale
- Use a 70-200mm to compress overlapping ridgelines into stacked layers
- Keep your own footprints off the foreground sand you intend to shoot
Deadvlei: the mid-morning magic window
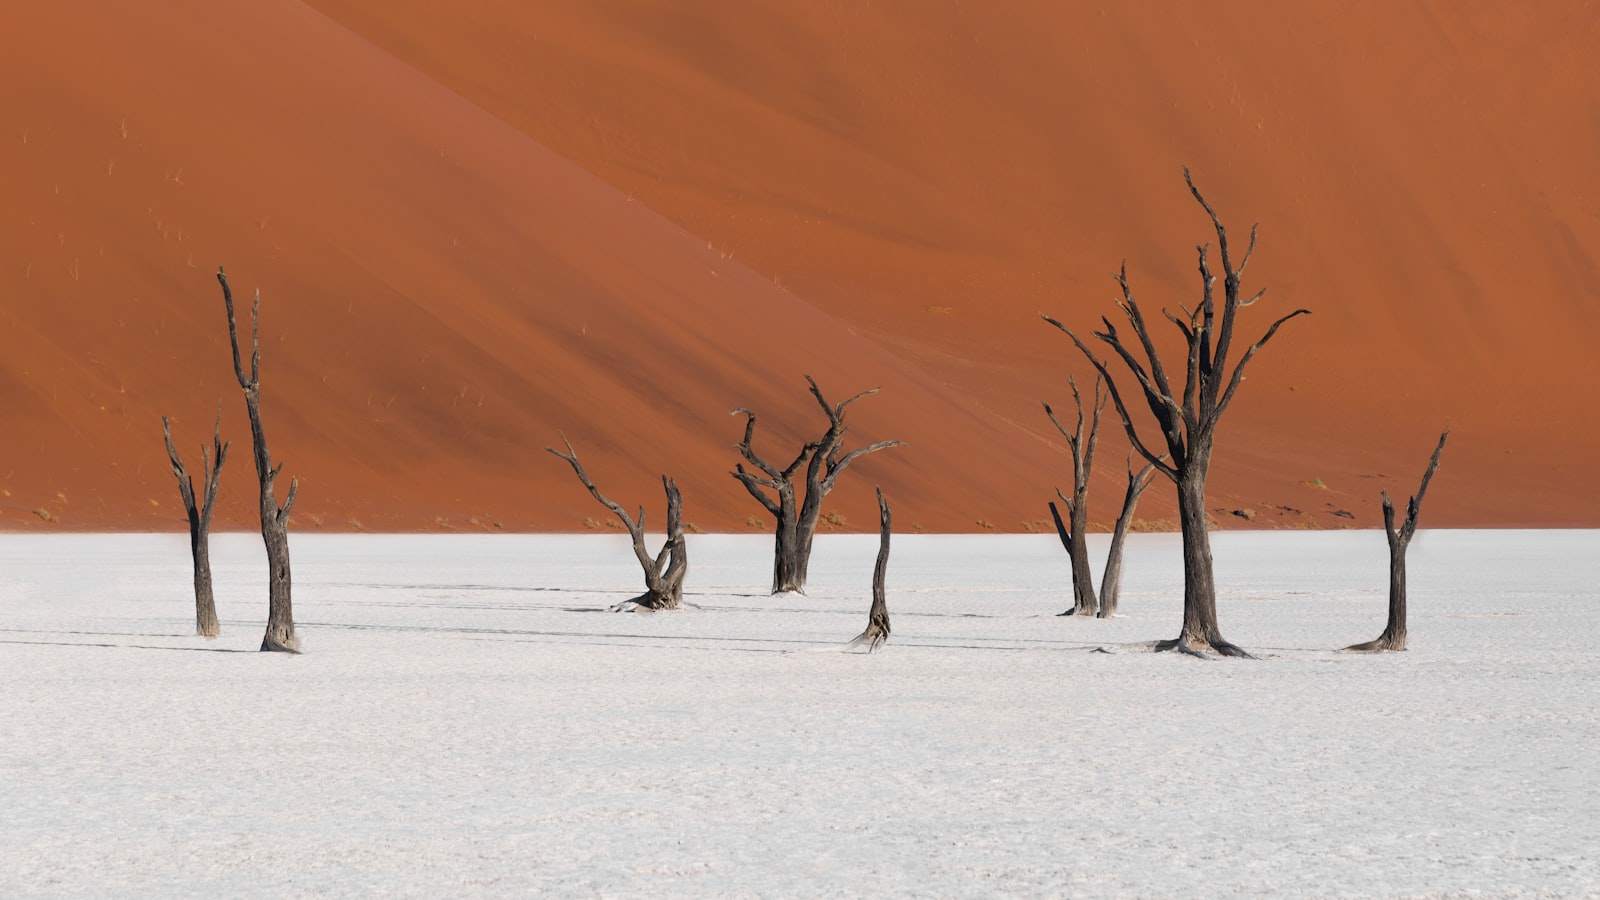
Photo by Felipe Labate on Unsplash
Deadvlei is the reason many photographers come. Reaching it means parking at the 2x4 car park, taking the shuttle or driving the last soft-sand stretch, then walking 15 to 20 minutes over a low dune into the pan. The cracked white clay floor, the black skeletal trees and the burnt-orange Big Daddy dune behind them form a graphic palette that almost composes itself.
Counter-intuitively, the best light here is not sunrise. The window you want is mid-morning, once the sun has climbed enough to light the great dune behind the pan so it glows orange while the trees and pan floor stay in shade. That separation of a bright backdrop against dark, side-lit trees is the classic Deadvlei frame.
Harsh midday light, usually the enemy elsewhere, works here too. The brutal contrast flattens the scene into stark graphic shapes: white floor, black tree, blue sky, orange sand. Lean into it by simplifying, shooting tight on a single tree, or using the cracked clay as a textured foreground leading line.
Big Daddy, Big Mama and the climb down
Big Daddy, at roughly 325m, is the tallest dune overlooking Deadvlei, with Big Mama facing it across the pan. Climbing the ridge of Big Daddy is a serious effort in soft sand and heat, best started at first light before the surface bakes, and it delivers a high vantage looking down onto the white pan and its trees from above.
The reward shot is the plunge: running or sliding down the steep face straight into Deadvlei, with the pattern of footprints and the tiny trees far below. From the crest, a telephoto isolates the pan as an abstract of white against red. Carry plenty of water, protect your gear from the constant fine sand, and give yourself a couple of hours for the round trip.
Sesriem Canyon and Elim Dune
Not every frame is a dune. Sesriem Canyon, near the gate, is a narrow gorge carved by the Tsauchab River through layers of conglomerate. It photographs best in the softer light of late afternoon, when reflected glow bounces between the walls; a wide-angle exaggerates the depth and a polariser cuts the haze on any standing water.
Elim Dune, a short drive from Sesriem camp, is an easy alternative for a sunset when you do not want the long drive to the inner dunes. It catches warm evening light and gives a clean grassland-to-dune foreground. Both spots fill the gaps in a day built around the early dune light and the mid-morning Deadvlei window.
Kit, settings and protecting gear from the sand
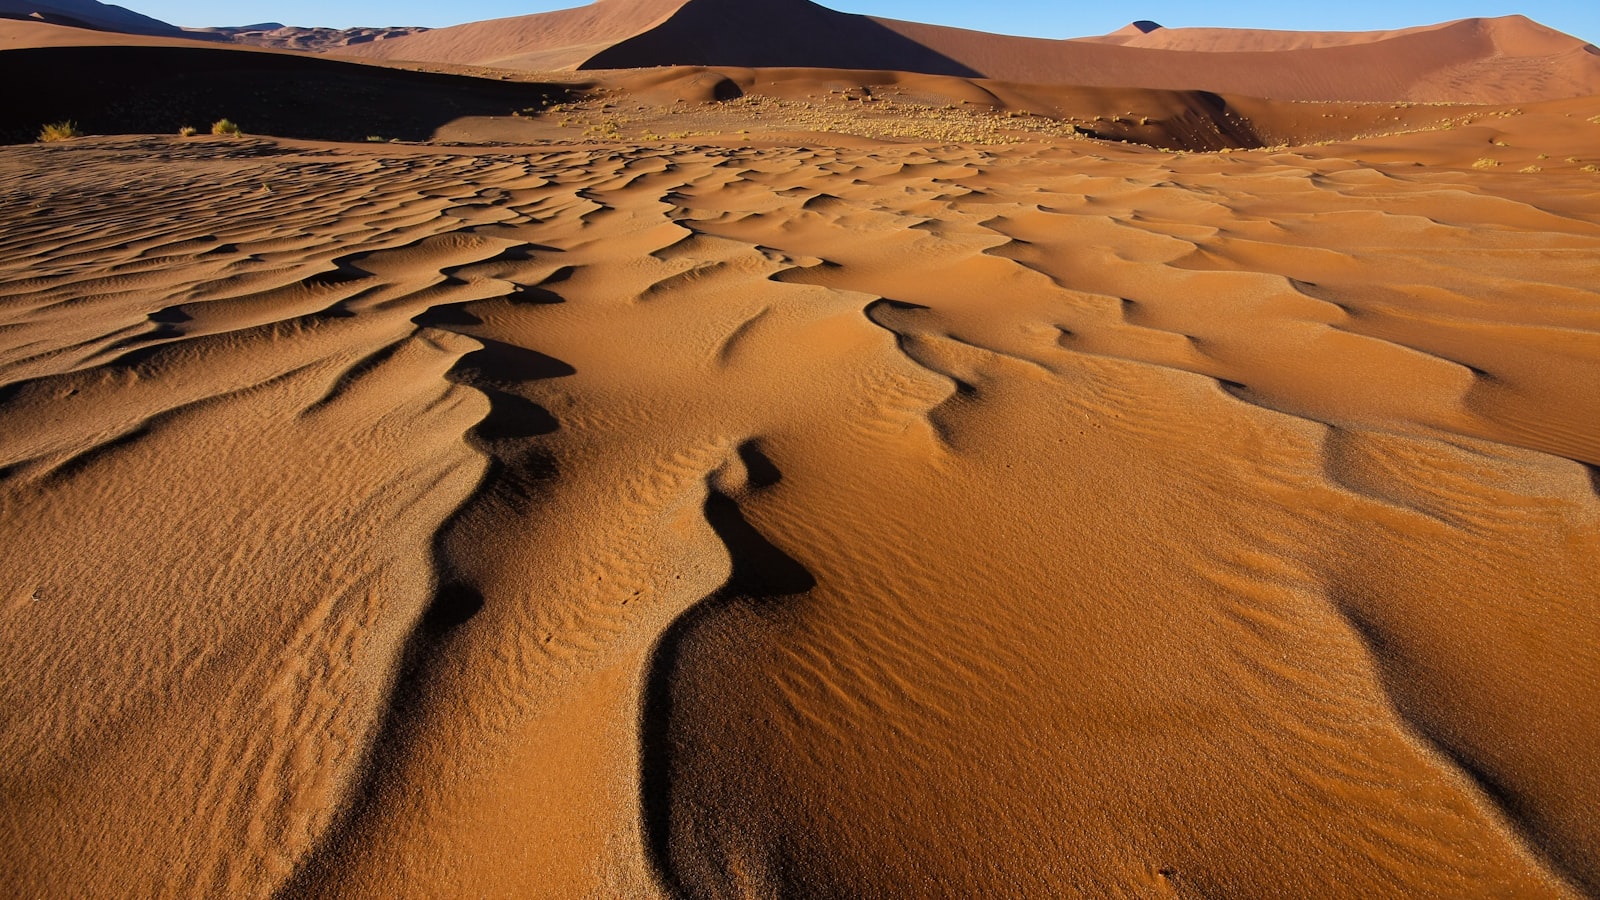
Photo by Andy Bitterer on Unsplash
Two lenses cover almost everything: a wide-angle for the canyon and for sweeping dune foregrounds, and a 70-200mm or 100-400mm telephoto for compressing ridgelines and isolating single trees against glowing sand. A polariser deepens the sky and tames glare; a light but stable tripod helps in the low pre-sunrise light and for any bracketing.
Sand is the real threat. The Namib's wind drives a fine, abrasive dust into every seam, so change lenses as rarely as possible, ideally inside the vehicle, and keep bodies in sealed bags between locations. Carry a rocket blower, a microfibre cloth and a couple of zip-lock bags; never use canned air, which can drive grit further in.
For settings, shoot RAW and expose for the highlights so the bright sand and white pan retain detail; you can lift shadows later. Keep ISO low, use the polariser thoughtfully, and bracket when the dynamic range between glowing dune and shaded tree gets extreme.
- Wide-angle (16-35mm) for foregrounds and Sesriem Canyon
- Telephoto (70-200mm or 100-400mm) for compression and isolated trees
- Circular polariser and a light, stable tripod
- Rocket blower, sealed bags, microfibre cloth; minimise lens changes
- Shoot RAW, expose for highlights, keep ISO low, bracket high-contrast scenes
When to go and a realistic morning plan
Aim for the cooler, clearer months of April to October. Daytime temperatures are bearable, the air is generally clearer, and the low winter sun stays kind for longer into the morning. The summer months from November to March bring fierce heat that makes climbing dangerous and harsh light that arrives early; midday in any season is for resting, not shooting.
A workable morning: queue at the inner gate before it opens, drive straight to Dune 45 for sunrise, then push on to the 2x4 car park and take the shuttle over the last soft sand. Walk into Deadvlei to catch the mid-morning glow on Big Daddy behind the trees, and if you have the legs, climb a ridge for the high angle.
By late morning the heat and contrast build, so retreat to camp, back up your cards, clean your gear thoroughly, and rest. Save the afternoon for Sesriem Canyon or an Elim Dune sunset, then repeat the early start the next day; one morning rarely captures everything this landscape offers.
Frequently Asked Questions
- Why does staying inside the Sesriem gate matter so much?
- Guests at camps inside the inner gate are admitted roughly an hour before day visitors waiting at the outer gate. That hour is the difference between reaching Dune 45 for true first light and arriving to harsh sun and footprint-covered dunes. For serious photography it is worth booking inside, even for one night.
- When is the best light at Deadvlei?
- Mid-morning, not sunrise. You want the sun high enough to light the big orange dune behind the pan while the trees and white clay floor stay in shade, giving that signature separation. Harsh midday light also works at Deadvlei, flattening the scene into bold graphic shapes of white, black, blue and orange.
- What lenses should I bring to Sossusvlei?
- Two lenses cover most situations: a wide-angle around 16-35mm for foregrounds and Sesriem Canyon, and a telephoto of 70-200mm or 100-400mm to compress ridgelines and isolate single trees against glowing sand. Add a circular polariser and a light, stable tripod for low pre-sunrise light.
- How do I protect my camera from the sand?
- Change lenses as rarely as possible and only inside the vehicle, keep bodies in sealed bags between locations, and carry a rocket blower, microfibre cloth and zip-lock bags. Avoid canned air, which drives grit deeper into seams. The Namib's fine, wind-blown dust is abrasive and the main risk to gear.
- Which months are best for photographing Sossusvlei?
- April to October, the cooler dry season, brings bearable temperatures, generally clearer air and a kinder low winter sun. The November to March summer is fiercely hot, making dune climbs dangerous and pushing harsh light earlier. Whatever the season, treat midday as rest time and shoot the edges of the day.
- Do I need a 4x4 to reach Sossusvlei?
- Most of the road from Sesriem is tarred, but the final 5km to Sossusvlei and Deadvlei is deep, soft sand that requires a 4x4. If you are in a 2x4, park at the designated car park and take the park shuttle for the last stretch, then walk the remaining path into Deadvlei.
- How hard is the climb up Big Daddy?
- It is demanding. At roughly 325m of soft sand in rising heat, the ascent takes one to two hours and rewards you with a high view down onto Deadvlei. Start at first light before the sand bakes, carry plenty of water, and budget a couple of hours for the round trip including the descent into the pan.